Skip to main content
Beta
This lesson is in the beta phase, which means that it is ready for teaching by instructors outside of the original author team.
Light
Dark
Auto
Learner View
Instructor View
Menu
Introduction to Tree Models in Python
Introduction to Tree Models in Python
Key Points
Glossary
Learner Profiles
More
Discussion
Glossary
Search the All In One page
Toggle Theme
Light
Dark
Auto
Learner View
Instructor View
EPISODES
Summary and Setup
1. Introduction
2. Decision trees
3. Variance
4. Boosting
5. Bagging
6. Random forest
7. Gradient boosting
8. Performance
RESOURCES
Key Points
Glossary
Learner Profiles
Discussion
Glossary
See all in one page
All Images
Introduction
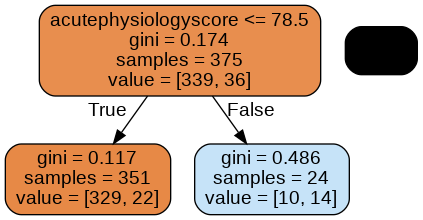
Decision trees
Figure 1
Image 1 of 1: ‘Simple tree’
Figure 2
Image 1 of 1: ‘Simple tree’
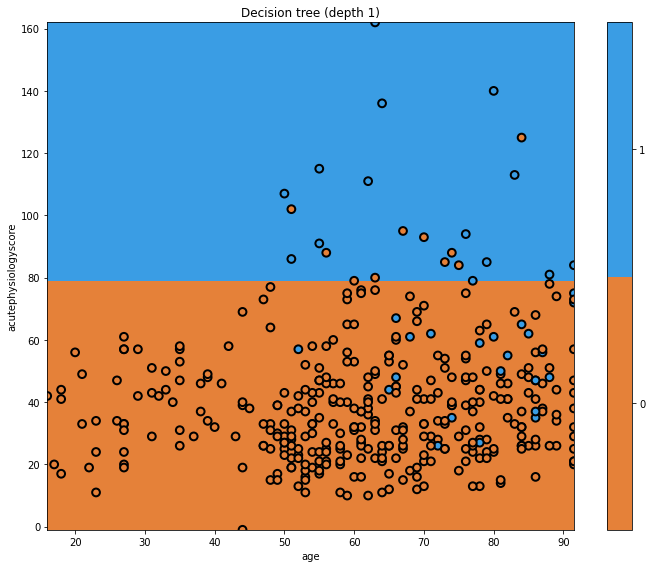
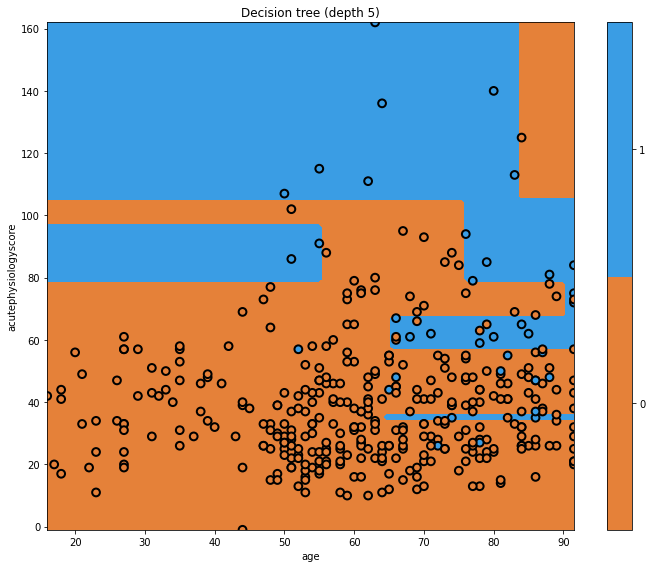
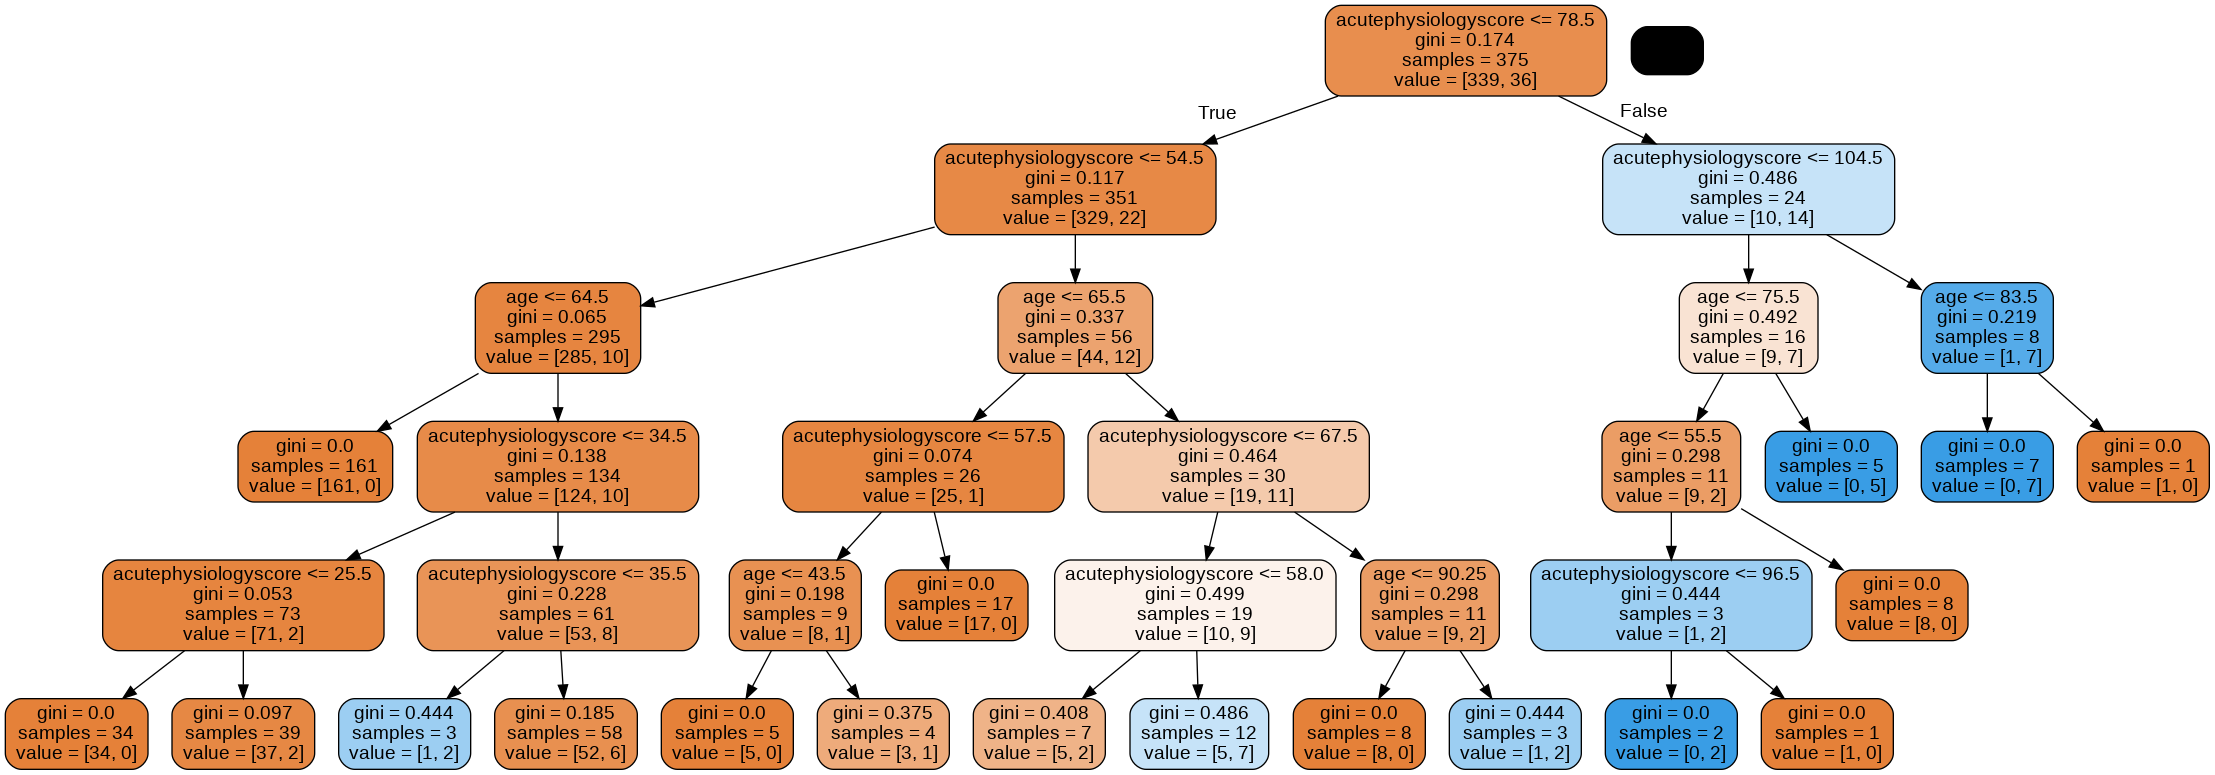
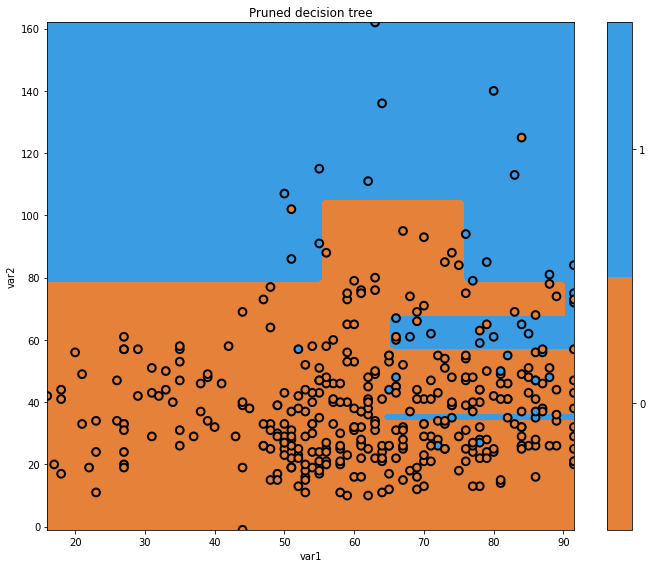
Variance
Figure 1
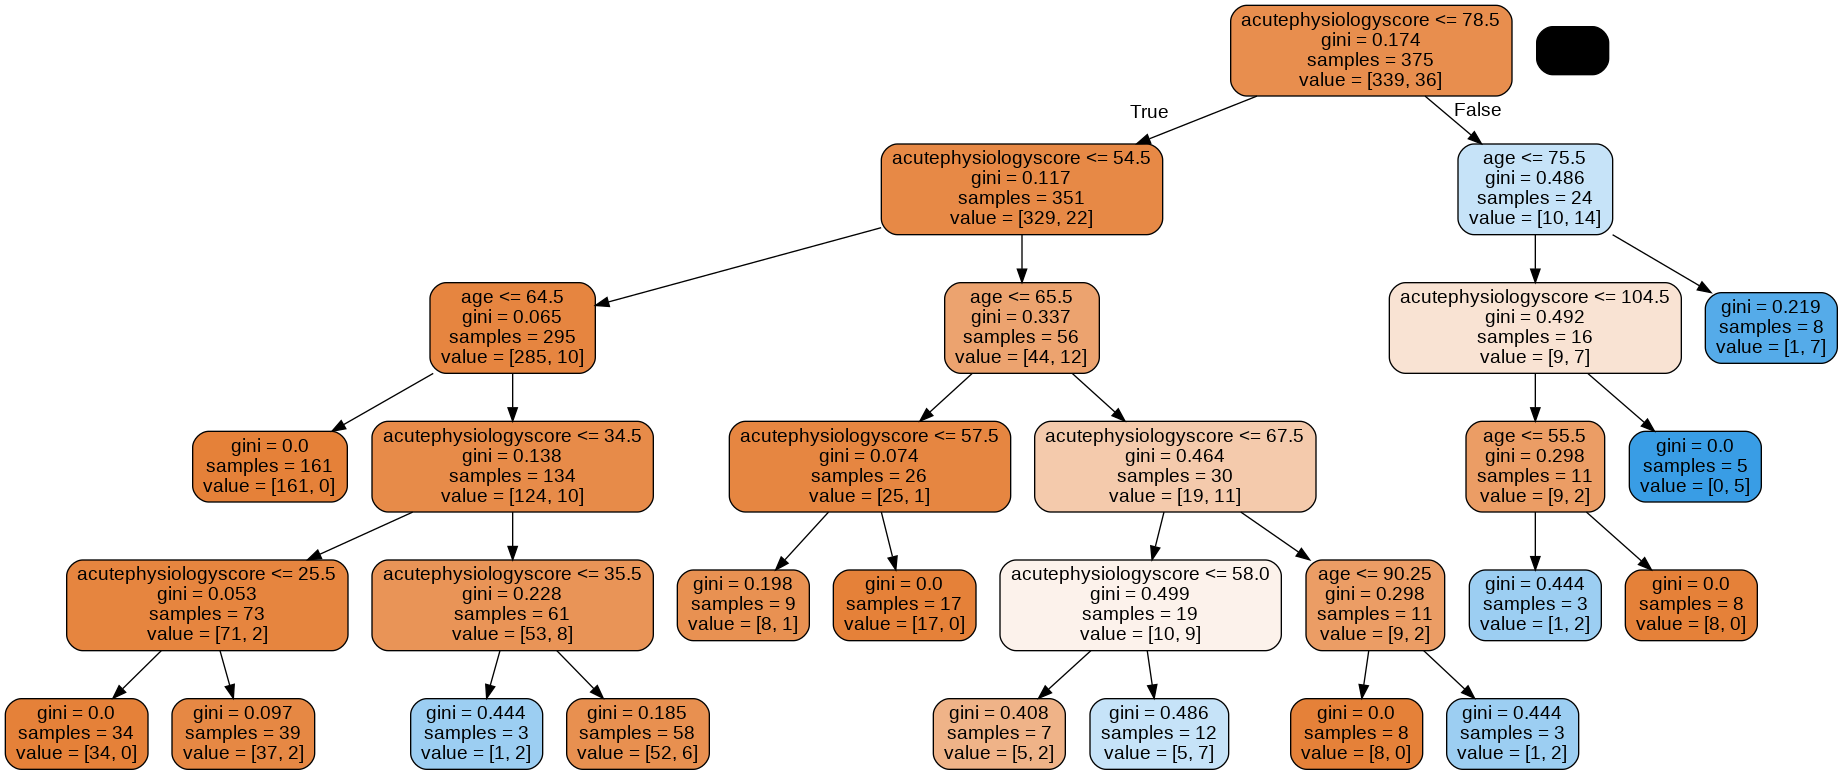
Image 1 of 1: ‘Simple tree (depth 5)’
Figure 2
Image 1 of 1: ‘Simple tree (depth 5)’
Figure 3
Image 1 of 1: ‘Simple tree (depth 5)’
Figure 4
Image 1 of 1: ‘Simple tree (depth 5)’
Figure 5
Image 1 of 1: ‘Simple tree (depth 5)’
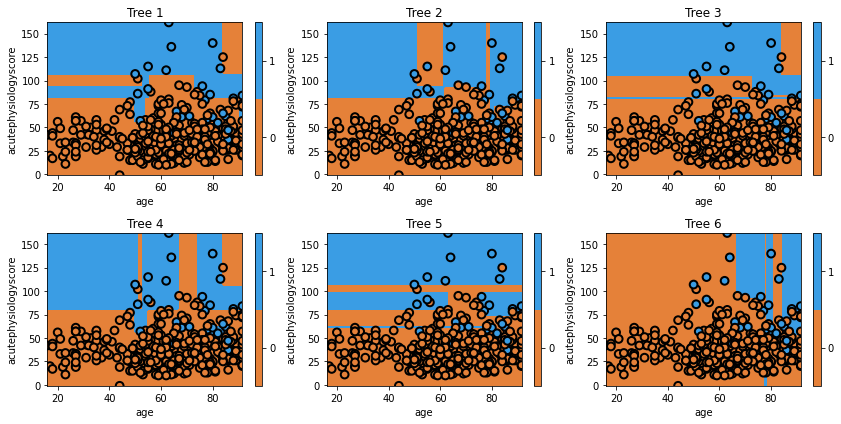
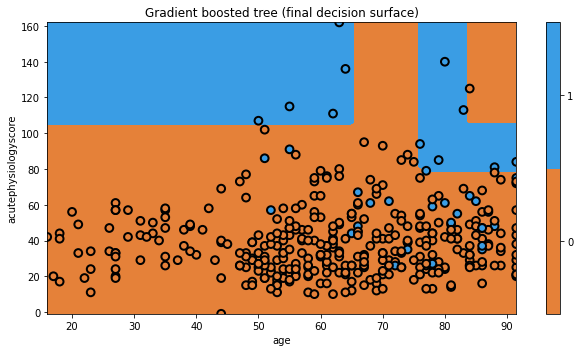
Boosting
Figure 1
Figure 2
Image 1 of 1: ‘Boosted tree’
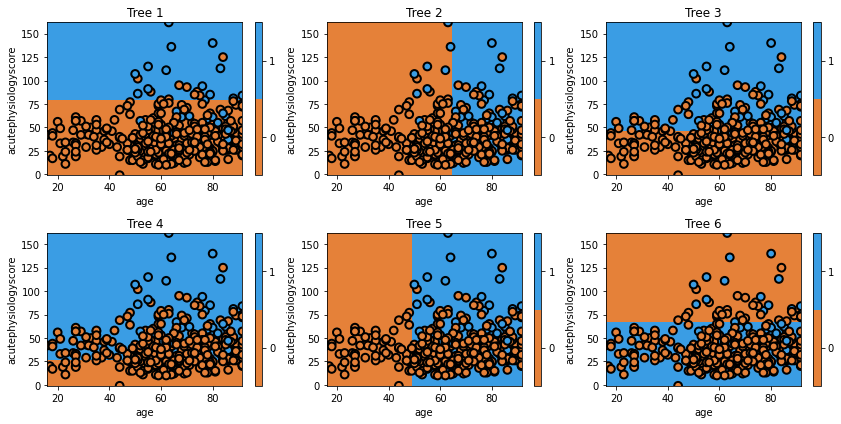
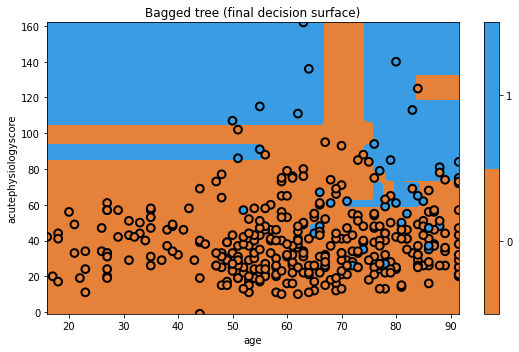
Bagging
Figure 1
Figure 2
Random forest
Figure 1
Figure 2
Gradient boosting
Figure 1
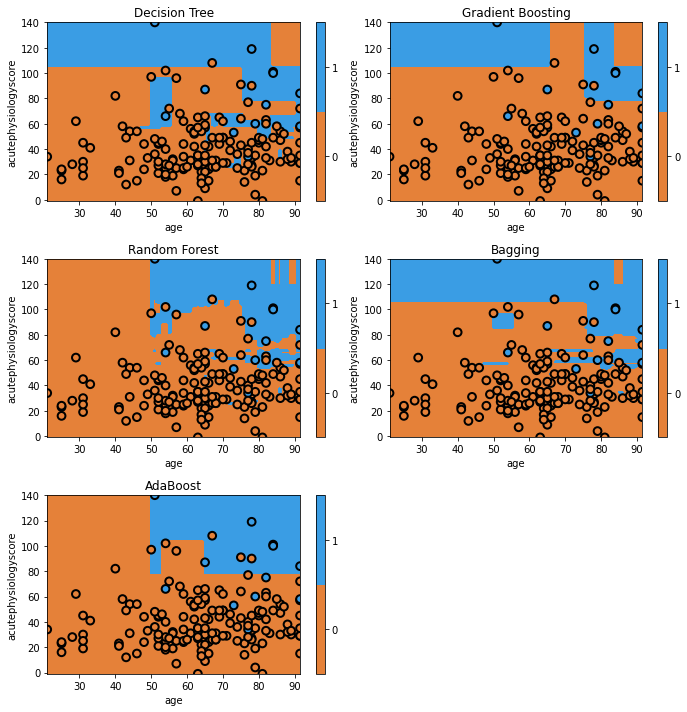
Performance
Figure 1
Back
To Top